Quick Picks
Quick Picks
To create a Quick Picks template, select Quick Picks under the Point of Sale section of OpSuite. In the upper left corner, select New Quick Picks Template.
First, rename the template by clicking Rename Template at the bottom of the screen. There are a few ways to create groups of items in Quick Picks. You can select individual items, you can group them in a folder, or you can do both.
Add Folder
Folders allow you to group certain items together on the Quick Picks page on the POS. To add a folder, click the Add Folder button and name the folder. Use a name that will easily identify what items are inside the folder. The order you add the folders is the order they will appear on the Quick Picks page.
To add items to the folder, click on the folder name you want to add to, then click Select Items. A pop-up window will allow you to search for and add individual items. As you add items, they will appear in the window on the right as shown below.
Adding Items
A pop-up window will allow you to search for and add items to the Quick Picks template. Once you have selected your items, click Close. The items will then appear to the right of the Folders and Templates.
Applying a Quick Picks Template
Once you have created your folders and templates, you must assign them to your devices. 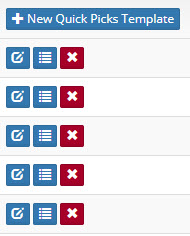 From the lookup page, click on the middle, Apply Template button for the Quick Picks Template you want to assign.
Select the devices you want to apply the Quick Picks template to, and click Apply. You may select an entire location or multiple locations, or individual devices.
Related Articles
Devices - Old Version (V5)
Devices OpSuite Point of Sale (POS) devices can be found under Point of Sale / Devices. Each device will have a unique Device Key that will aid in setting up the device. In this section, you will learn the different settings and features available on ...Navigating OpSuite POS - V5 Depreciated
Navigating OpSuite Point of Sale The top bar of of the POS is home to many functions of the device. Main Menu - Displays multiple functions of the point of sale device. Search - Allows you to search records from inventory, customer, and history ...Performing a Transaction - V5 Depreciated
Performing a Transaction The OpSuite Point of Sale's primary function is to perform sale transactions. This section will show you step by step how to perform a transaction, including adding and/or removing items and tendering out the transaction. 1. ...Receivers Creation
Creating Receivers Receivers can be created through the Receivers section of OpSuite, or through the Purchase Order or Transfer Order screens. Custom receivers can also be created outside of a Transfer or Purchase Order. Creating a Receiver from ...Receivers Overview
Receivers Receivers are used to receive inventory into a location from Purchase Orders or Transfers in, to issue inventory out of a location from a Transfer Out, or to Receive inventory into a location on the fly (Custom Receiver) when a Purchase ...