Matrix Items
Matrix Items
The Matrix Item module allows users to create and manage items that have multiple dimensions, such as clothing, shoes, etc. The OpSuite Matrix module supports items with up to three dimensions (i.e. size, color, material, or width, length, color). Dimensions can be set up and maintained by the user by using Item Tags, so the options and combinations are almost endless.
Matrix Item Module
Matrix Items are located within the Inventory module of OpSuite 5. When selected, a lookup page, identical to those throughout OpSuite will open.
To create a new matrix item, select New Matrix Item from the lookup page. Begin by entering your standard item information, such as the main sku, description, location group, department and category, etc.
**Note if your items going to be put in a Web store you must put a check mark in #10, listed below. You will not be able to go back once saved .
Next you will select how the sku and description are generated, along with the locations this item will be active at.
Once complete, select Save.
Once saved, you can select your dimensions, or the variables to your item. The dimensions are created within Item Master Tags, and marked as a Matrix Tag. In this example, we are creating Ladies Fall Shirts, so we have chosen Ladies Shirt Sizes and Fall Colors.
As you select your dimensions, the matrix table will start to form below. 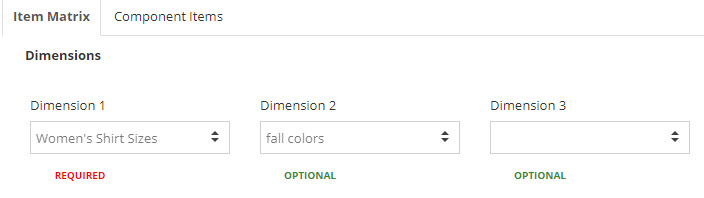
On the matrix grid, select the rows and columns, or individual cells you want to create. In this instance, we only want to created Ladies Fall Shirts for the Ladies sizes SM - XL , and in Fall colors of Orange, Plum and Brown.
To select all dimensions, simply click Select All.
Once you have selected the dimensions to create, you will need to Build the items. The number next to Build Items indicates how many items will be created.
Now that your items have been created, the matrix grid will show the each item’s sku, and will default to Item Edit mode. Here you will be able to set sale prices and dates, update the cost or price, as well as view the quantity on hand and on order.
Here we am changing the Price from the original $35.00, to $37.00, on XL sizes only , which will leave the SM through LG the original price. After each change, remember to hit Save the the changes take effect.
The items can also be viewed in a table to show all information on the items. To view the table, click Component Items. This will list each item, along with the quantities, cost and prices.
From this view, you can also edit each row by selecting the edit button next to the sku.
Related Articles
Tags
Tags Tags are another tool that can be used to further label items, customers, suppliers employees and locations. These tags add another layer of description. You can use tags for the following: 1. Items 2. Customers 3. Suppliers 4. Employees 5. ...Login and Navigation
Logging Into OpSuite Office OpSuite Office is a cloud (internet) based business application, and therefore is accessed via the internet through a web browser (Chrome version 56 or higher recommended). Using your assigned URL (Web Address), go to the ...Item Records - Old Version
Notice: This version of the item records is scheduled for End-of-Life in the future Items To access an Item Record, select Items from Inventory in the Navigation menu. The Item list, or item search screen will appear, displaying the top set of items. ...Point of Sale Orders - V5 Depreciated
Point of Sale Orders There are four (4) types of orders available on the OpSuite Point of Sale: Work Orders Special Orders Layaway Backorders This section will show you how to create, edit, partial pickup and complete work orders, special orders and ...Promotions Legacy Version - V5 POS Systems
Campaigns / Promotions Promotions are found under the campaigns menu in OpSuiteOFFICE: Once you are in the Promotions section, you will see a list of any existing Promotions: At the top right of the list you will see two buttons - CREATE - This ...